Getting started with CVizza
Set up your profile, create and publish your first CV, save a job posting and track your application in CVizza. A step-by-step guide with screenshots.
This guide takes you from an empty workspace to your first tracked job application in four steps: fill in your candidate profile, create and publish a CV, save a job posting, and track your application.
Before you start
You need a CVizza account. Create one and confirm your email address, or log in if you already have an account. Have your work history and one job posting (a link or the text of the description) at hand. Nothing in this guide requires you to apply anywhere yet.
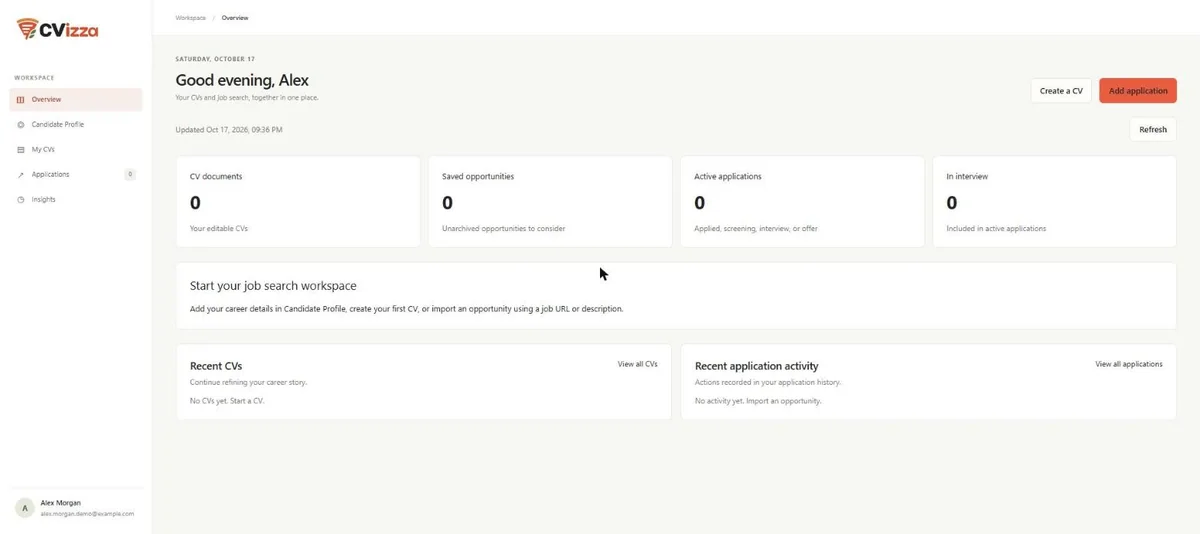
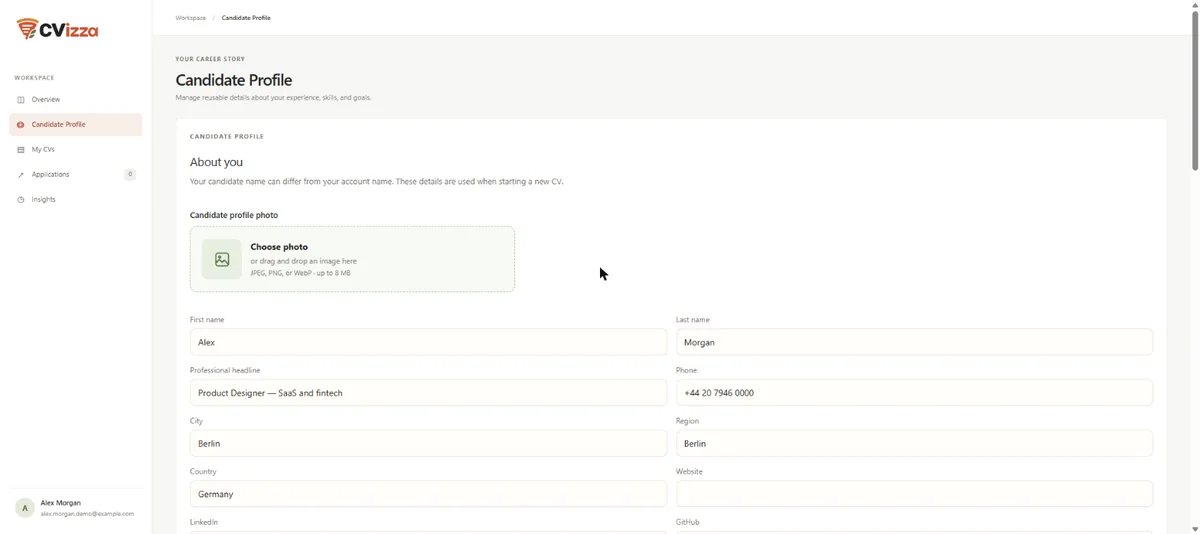
When you log in, you land on the Overview page. The sidebar gives you the four places you will use in this guide: Candidate Profile, My CVs, Applications and Overview.
Step 1: Fill in your candidate profile
Your candidate profile is the reusable source for everything else. You enter your career details once, and CVizza uses them every time you start a new CV.
- Select Candidate Profile in the sidebar.
- Check your First name and Last name. Your candidate name can differ from your account name.
- Add a Professional headline, your contact details and links, and a short About you summary. You can also add a profile photo (JPEG, PNG or WebP, up to 8 MB), which is optional.
- Select Save profile.
Next, add your experience. Each section below the profile form has its own button.
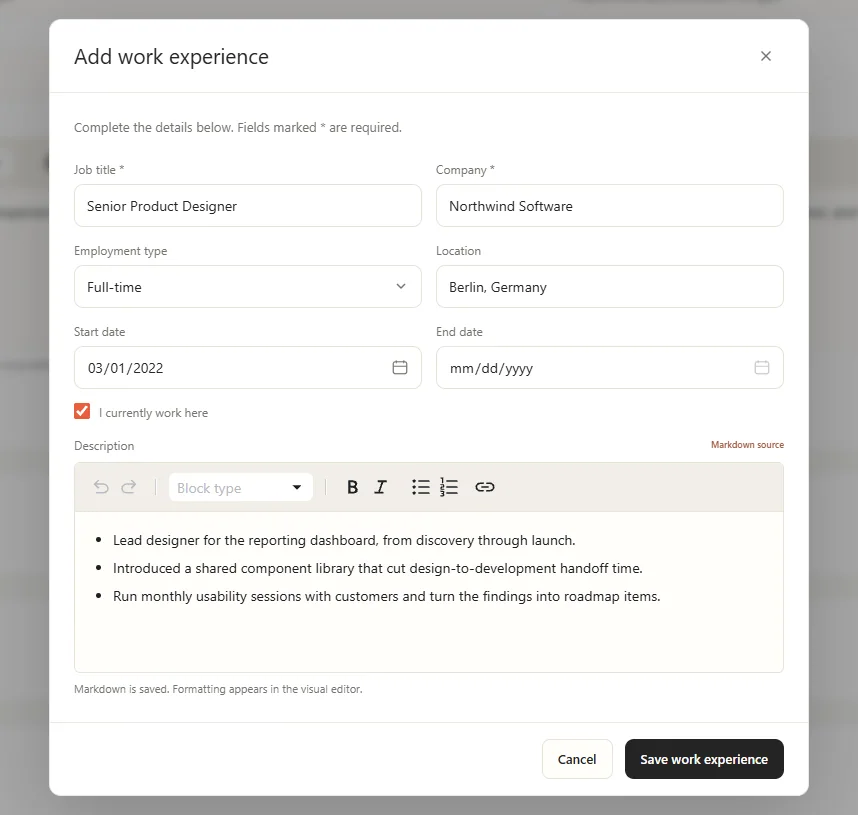
- Next to Work experience, select Add work experience.
- Fill in Job title and Company. These two fields are required. Add the employment type, location and dates as well.
- For your current role, tick I currently work here instead of entering an end date.
- Use the Description field for your responsibilities and results. Bullet points work well.
- Select Save work experience.
Repeat the same steps for Education, Skills, Languages, Certifications and Projects. You only need the sections that are relevant to you. Drag the handle at the left of an entry to change the order.
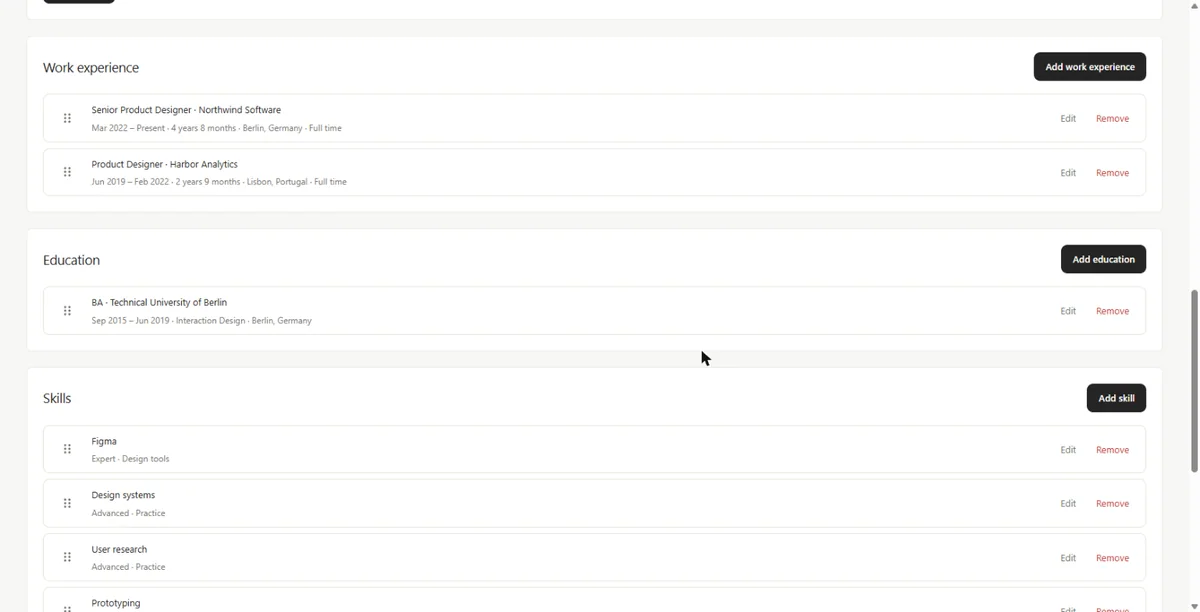
Result: your profile shows your saved entries in each section.
Step 2: Create your first CV
A CV is a presentation of your profile. Creating one copies your profile information into a separate draft that you can tailor. Later changes to your profile do not alter CVs you have already created, and changes to a CV do not alter your profile.
Start the draft
- Select My CVs in the sidebar.
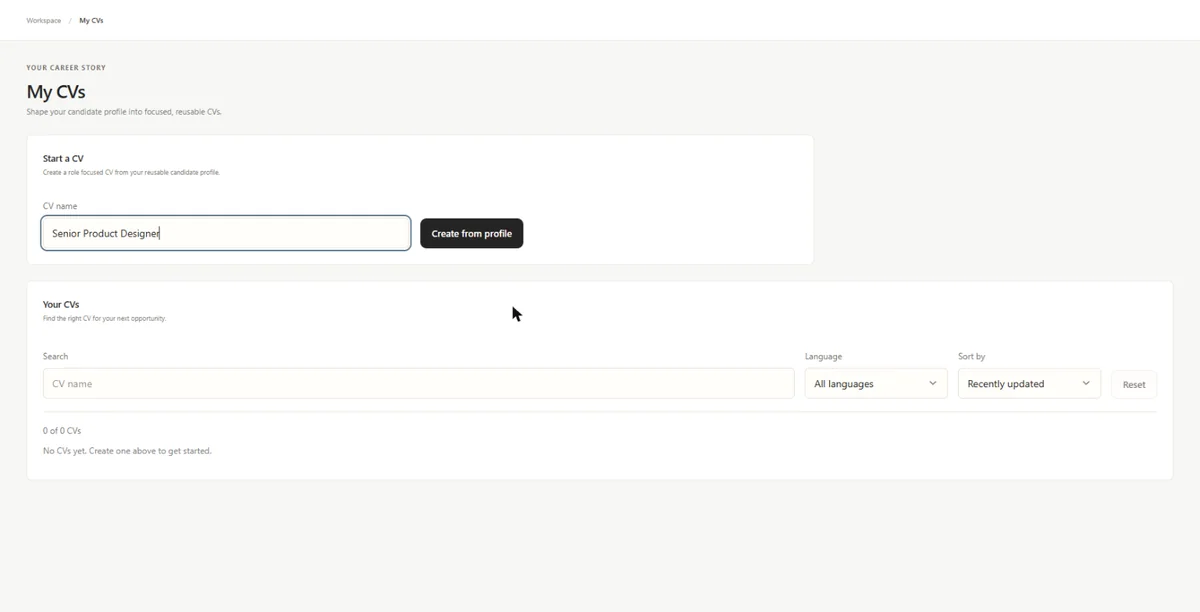
- Under Start a CV, enter a CV name, for example "Senior Product Designer".
- Select Create from profile.
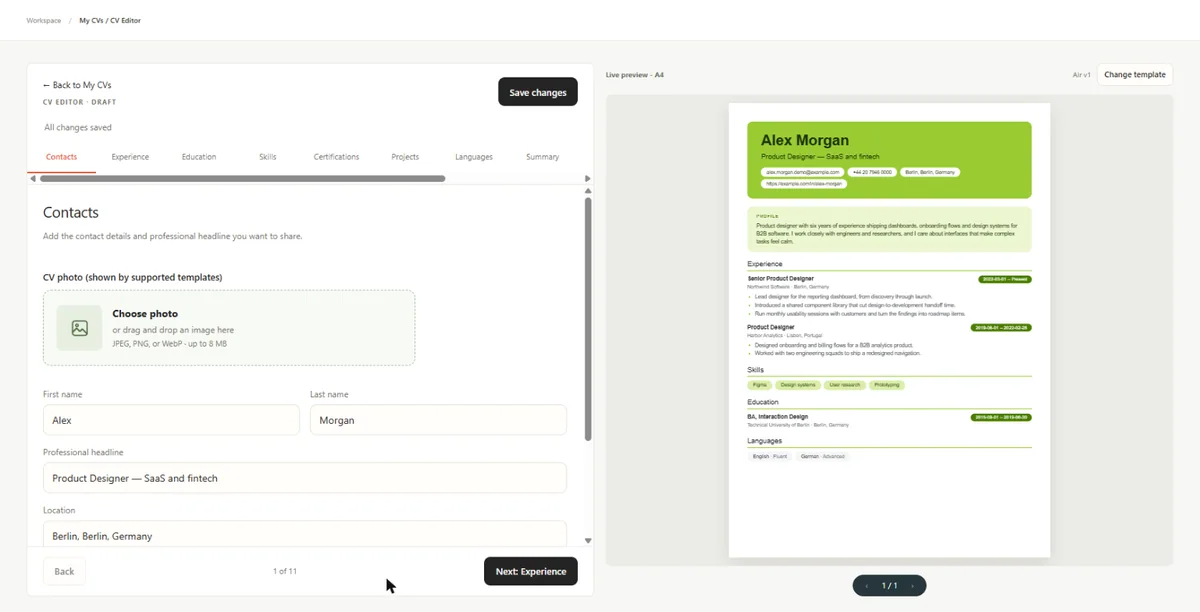
CVizza opens the CV editor. The form on the left is split into steps (Contacts, Experience, Education, Skills, Certifications, Projects, Languages, Summary, CV details, Download and Versions). The right side shows a live A4 preview that updates as you work. Use the step tabs or Next to move through the form, and select Save changes to store your edits. The status line under the editor title tells you whether everything is saved.
Choose a template
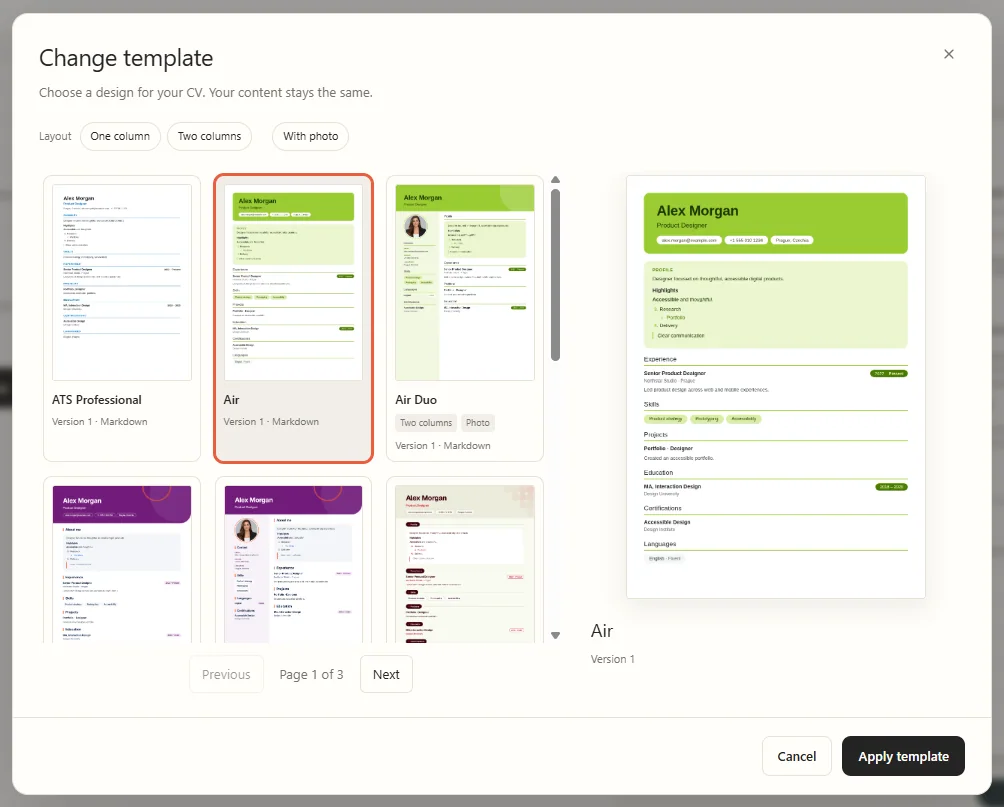
- Select Change template above the preview.
- Browse the designs. The One column, Two columns and With photo filters narrow the list.
- Select a design, then select Apply template. Your content stays the same.
You can also preview designs before you sign in on the CV templates page.
Publish a version
A draft is your editable working copy. A published version is a permanent snapshot that you can use in applications and download.
- Go to the Versions step.
- Select Save and publish version.
- When the Version 1 is ready message appears, your version is listed with View, TXT, PDF and DOCX buttons.
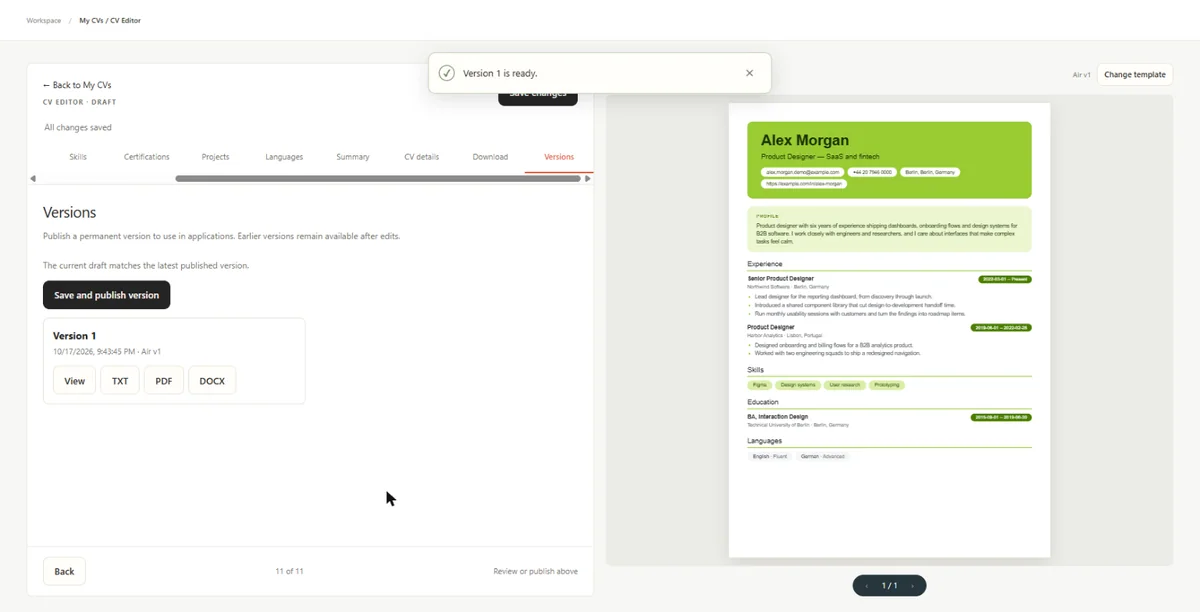
Result: you have a CV draft you can keep editing and an immutable Version 1 you can download or attach to an application. If you edit the draft later, publish a new version. Earlier versions stay available.
Step 3: Save a job posting
You do not need to type vacancy details by hand. Give CVizza a link or the text of the posting and review what it finds.
- Select Applications in the sidebar, then Add application.
- On the Job URL tab, paste the link and select Import opportunity. If the page needs a login, blocks automated access, or you only have the text, switch to Paste description, optionally add the Original URL, paste the posting into Job description, and select Import opportunity.
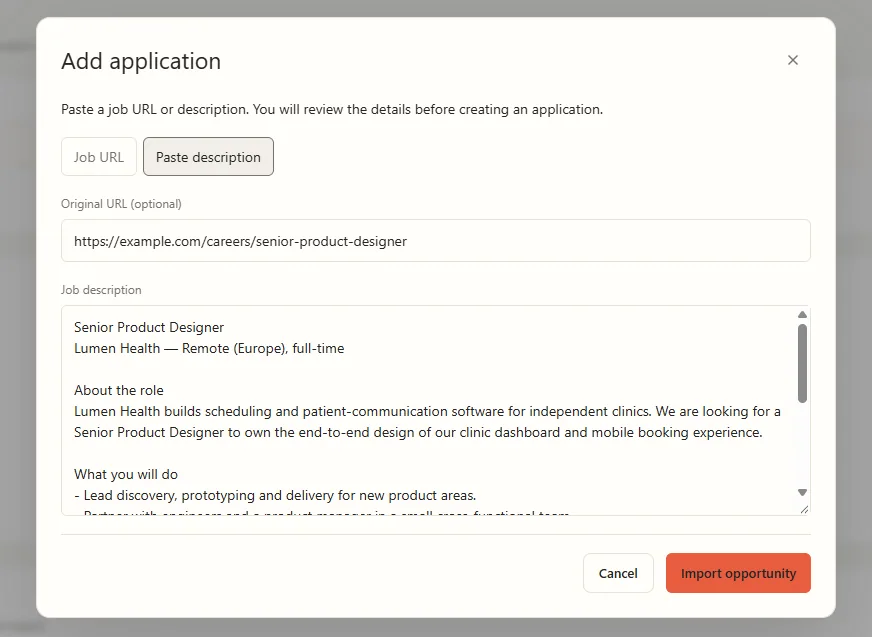
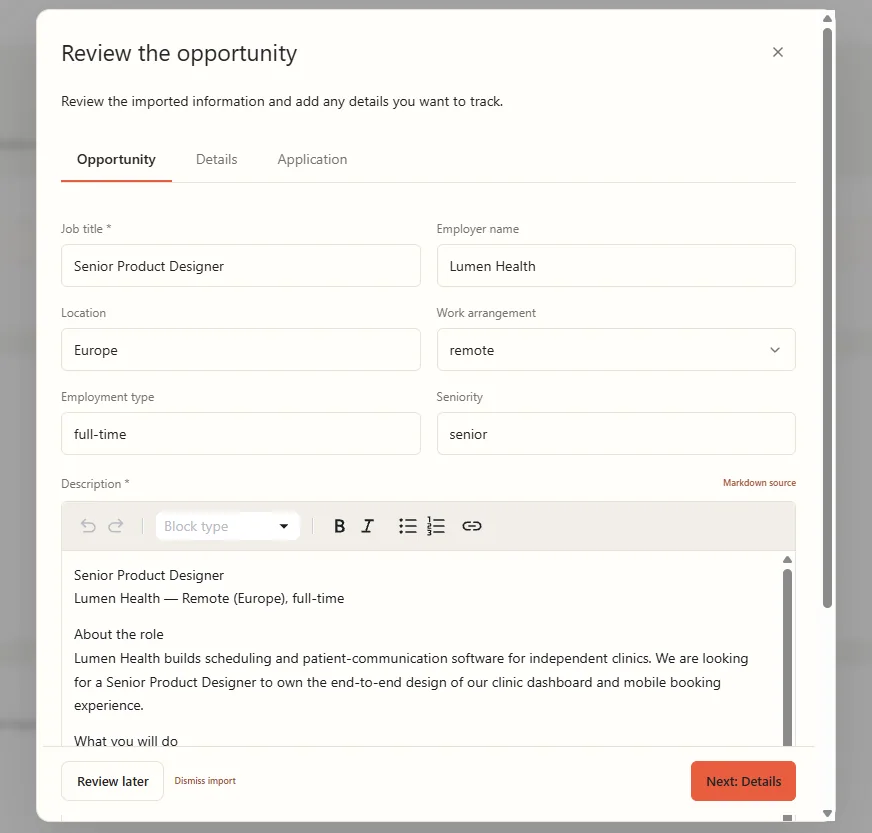
- The Review the opportunity dialog opens when the import finishes. Check the Job title, Employer name, Location, Work arrangement, Employment type and Seniority, and correct anything that is wrong. The Details tab holds additional posting information.
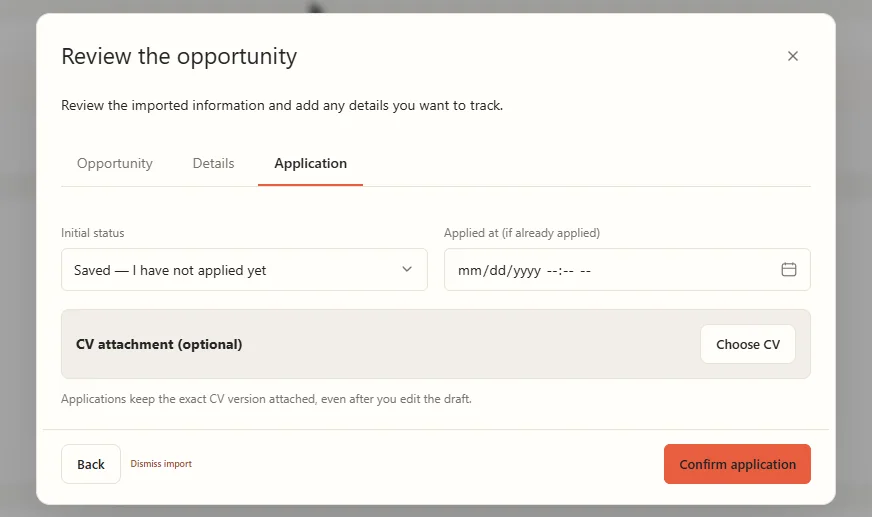
- Open the Application tab. Choose an Initial status: Saved — I have not applied yet is the default. If you have already applied, pick the matching status and enter the Applied at date. Attaching a CV here is optional.
- Select Confirm application.
Result: CVizza opens the application page with the tabs Overview, Activity, Notes and Tracking. The original description is saved with it.
Not ready to review? Select Review later to keep the import in the Recent imports list on the Applications page, or Dismiss import to remove it from your queue. You can restore dismissed imports later.
Step 4: Track your application
Record what you sent and where the application stands.
Attach the CV you submitted
- Open the Activity tab and select Add event.
- Set Event type to Cv submission.
- Select Choose CV, pick your CV draft, then pick the published version, and select Attach selected version.
- Add a comment if you like, then select Add event.
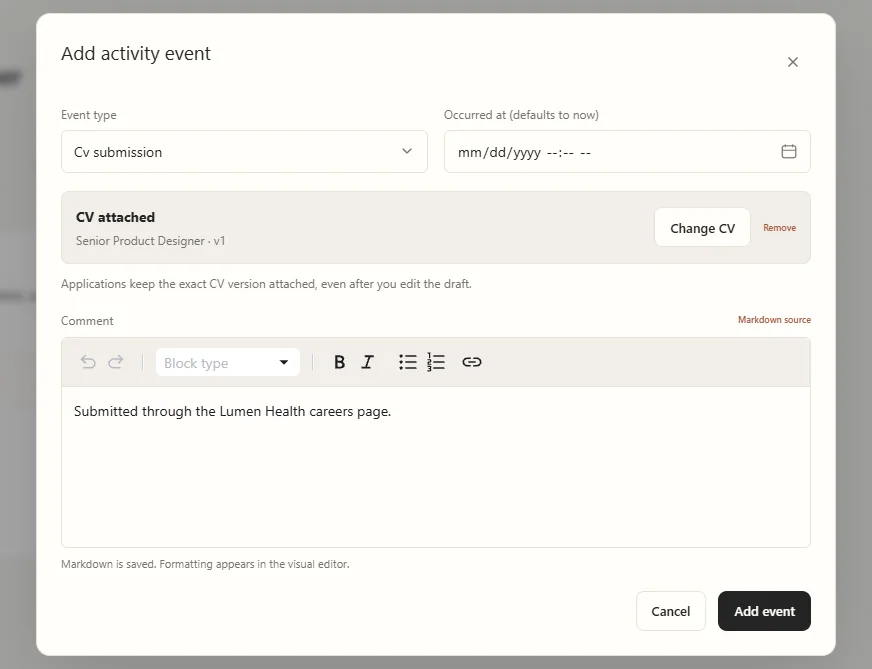
The application keeps that exact version, even if you change the CV draft afterwards. Select View submitted CV and downloads in the activity entry to open it again.
Update the status
- Open the Tracking tab.
- Choose the new Status. The options are Saved, Applied, Screening, Interview, Offer, Rejected, Withdrawn and No Respond (you never heard back and have stopped waiting).
- Add an optional reason and select Update status.
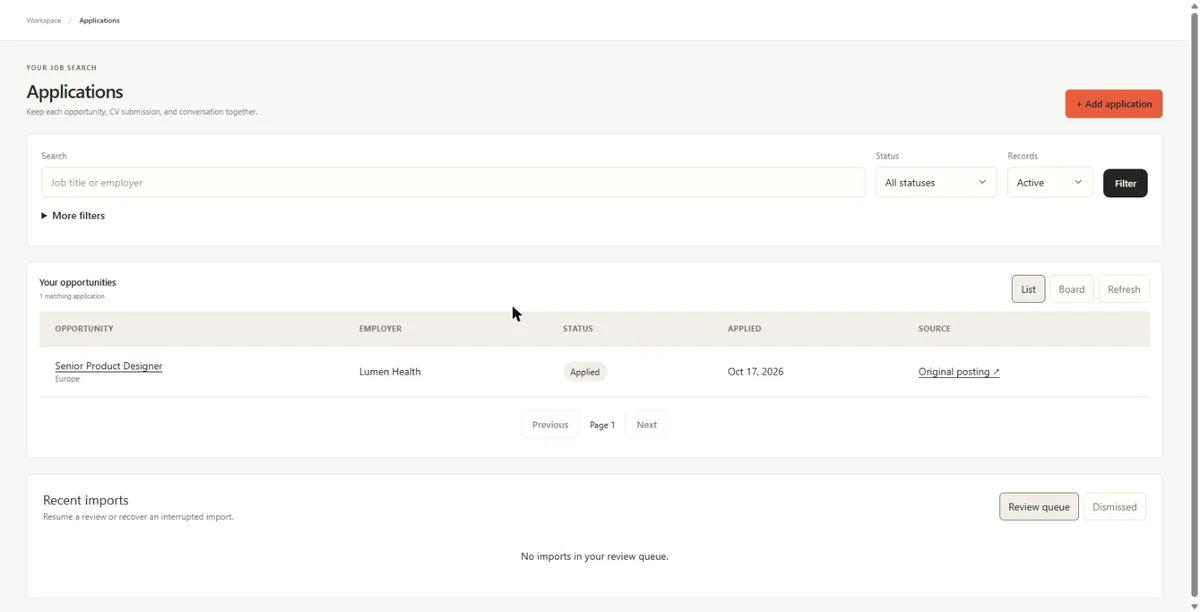
Go back to Applications to see your opportunities in a list with their status, employer and applied date. Switch to Board to see them grouped by status and drag a card to move it.
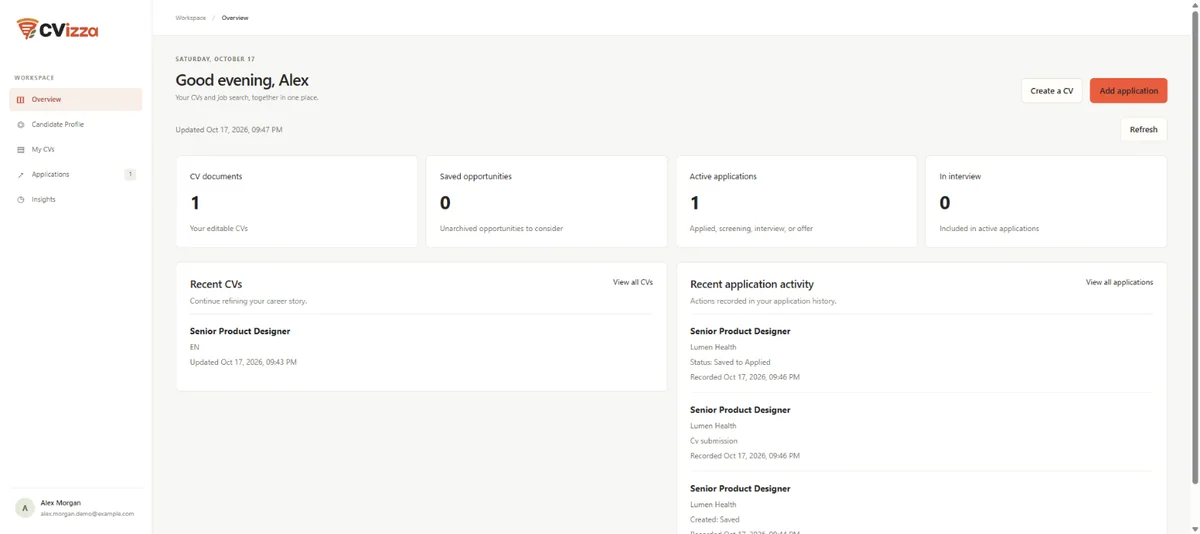
The Overview page now reflects your progress, with your CV count, active applications and recent activity.
Use the Notes tab for private notes and an expected salary range. If you no longer want an application in your active list, select Archive application on the Tracking tab. Archived applications can be restored.
If something does not go as expected
- The import is missing details or fails. Use Paste description instead of a link and correct the fields in the review dialog. You can also edit the vacancy details later from the application's Overview tab.
- You see "This draft or its template changed. Read it again before continuing." Your CV changed somewhere else, for example in another tab, or right after a template change. Select Reload saved draft and publish again.
What to do next
- Create another CV for a different role by selecting My CVs and starting a new draft from your profile.
- Look at more designs on the CV templates page.
- Learn more about CVizza on the About page, and read how your data is handled in the Privacy Policy.