Create and export your first CV
Create a CV from your CVizza profile, edit it for a role, pick a template, check the A4 preview and export it as PDF, DOCX or TXT. A step-by-step guide.
This guide walks you through creating a CV from your CVizza candidate profile, editing its content for a specific role, choosing a template, checking the preview, and exporting the result as a PDF, DOCX or TXT file.
Before you start
You need a CVizza account and a candidate profile with at least some details in it. If your profile is still empty, see Build your candidate profile. A CV copies your profile when you create it, so a few minutes spent on the profile first will save you typing later.
Step 1: Create a CV from your profile
- Select My CVs in the sidebar.
- Under Start a CV, enter a CV name. Use something that tells you what the CV is for, for example "Data Analyst". The name is private to you, and it is also used for the name of the files you download.
- Select Create from profile.
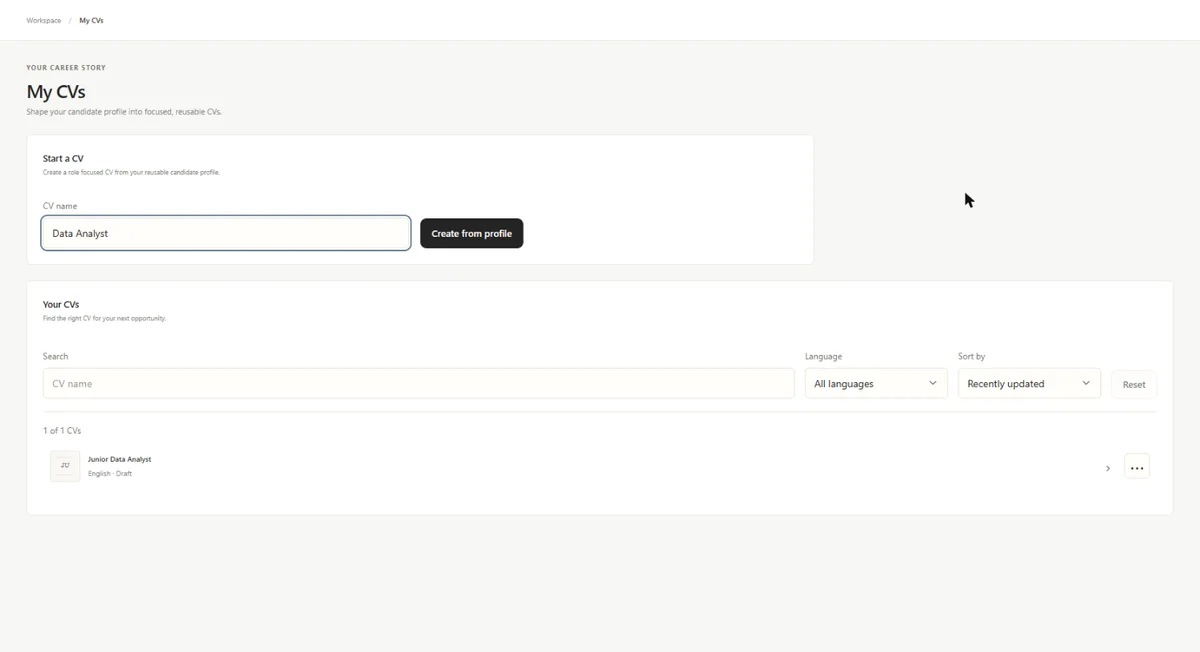
CVizza copies the information from your profile into a new draft and opens the CV editor. New CVs start with the Classic template. You can change it later in this guide.
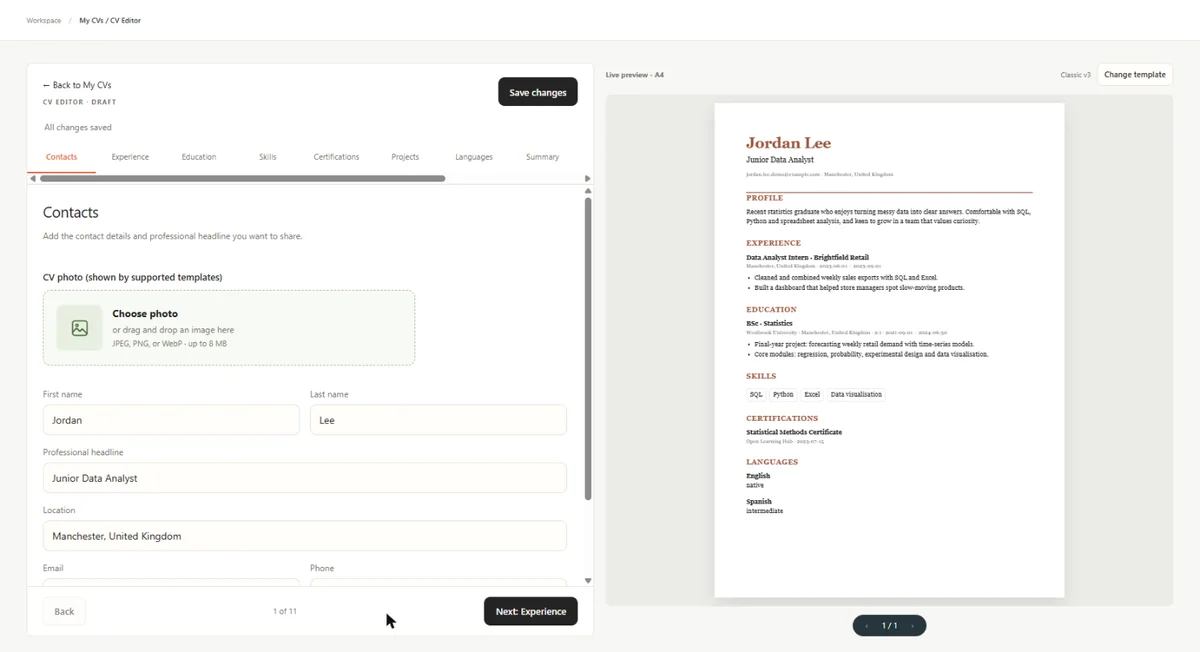
The editor has two parts. On the left is a form divided into steps: Contacts, Experience, Education, Skills, Certifications, Projects, Languages, Summary, CV details, Download and Versions. On the right is a live A4 preview that updates as you type.
Step 2: Edit the content for the role
The CV is your own copy of the profile data. You can rewrite anything in it without changing your profile or your other CVs.
- Use the step tabs, or the Next and Back buttons, to move through the form.
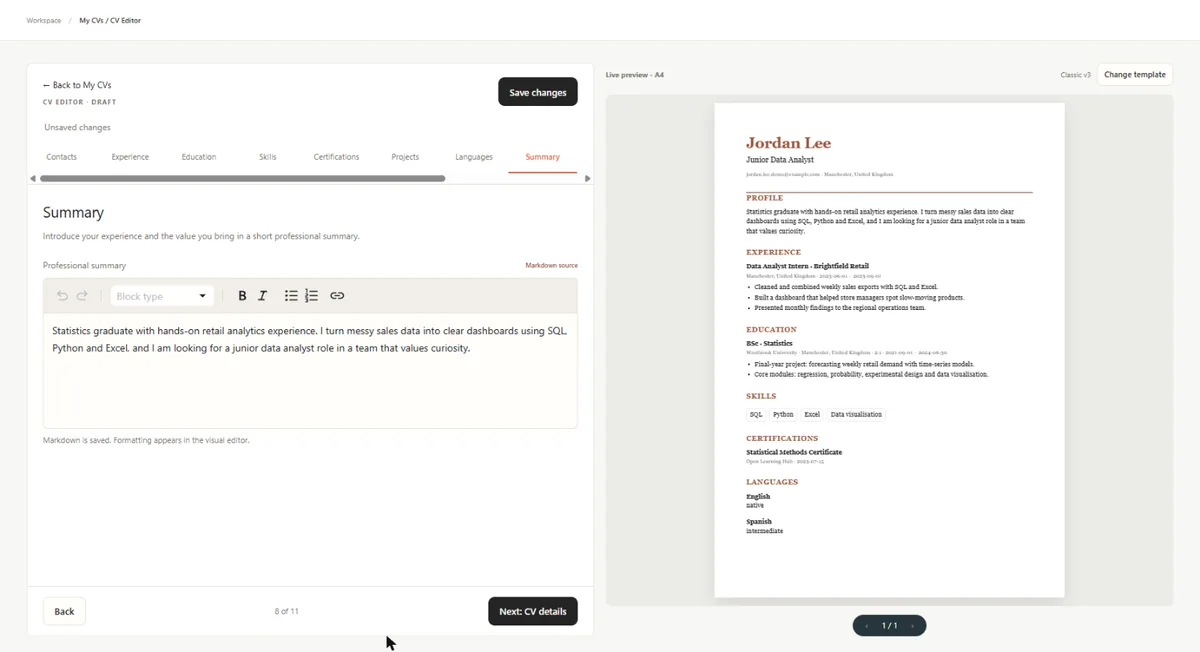
- In Summary, rewrite the text so that it speaks to the role you are applying for. The preview shows the change immediately, and the status line under the editor title changes to Unsaved changes.
- In Experience, select Edit next to an entry to adjust its title, dates or description. Select Add experience to add a role that exists only in this CV. Select Remove to leave an entry out, and drag the handle at the left of an entry to change the order. Education and the other list sections work the same way.
- Select Apply experience (or the matching button for another section) to confirm the entry.
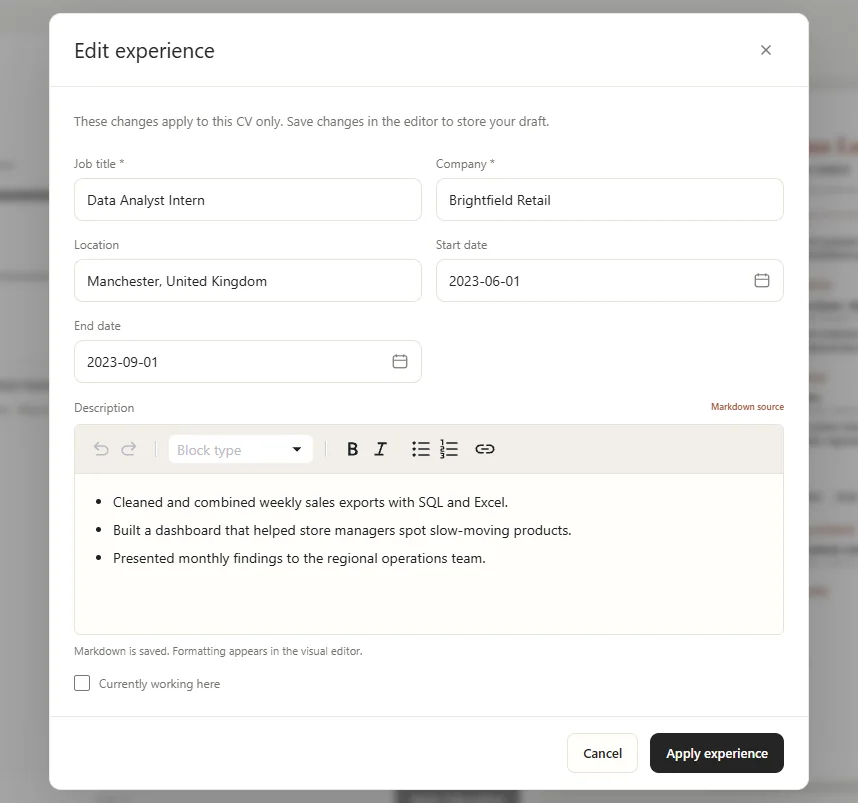
- Select Save changes at the top of the editor. When the status line shows All changes saved, your draft is stored.
Keep the most relevant experience first, and use short bullet points. Entries from your profile are only copied when you create the CV. To use an entry you add to your profile later, add it in the editor or start a new CV.
Step 3: Name the CV and set its language
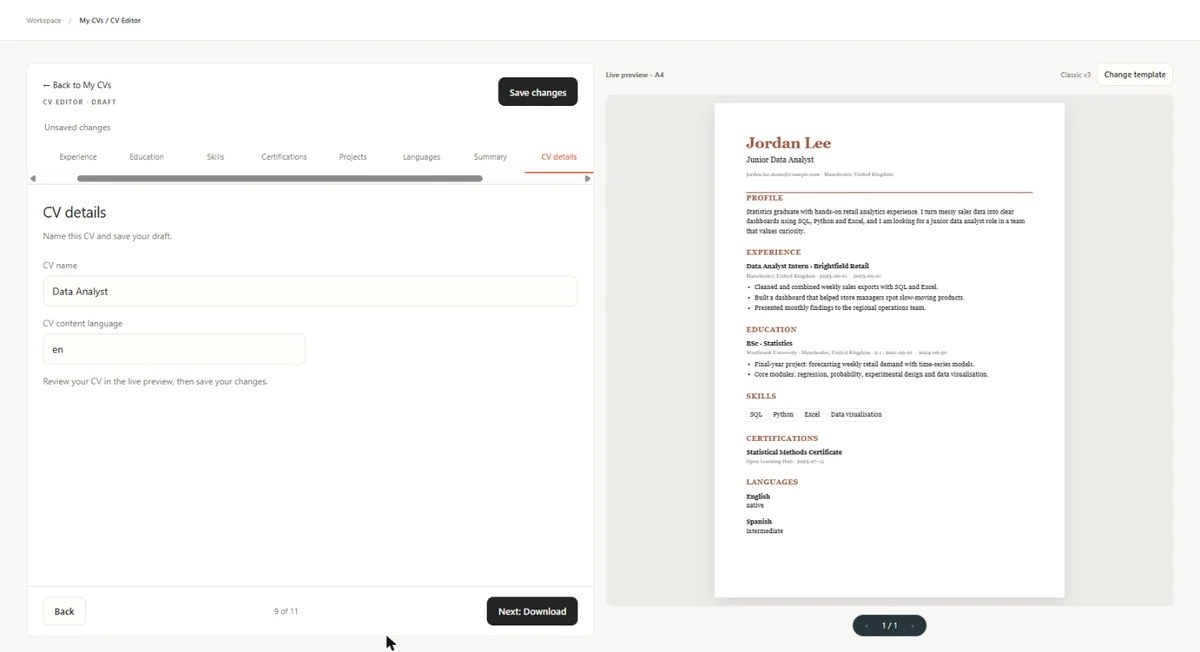
Open the CV details step.
- CV name: the private name shown in your list and used for downloads.
- CV content language: a language code such as
enorde. It describes the language of the CV content. The CVizza interface stays in English.
Step 4: Choose a template
- Select Change template above the preview.
- Use the One column, Two columns and With photo filters to narrow the list. Page through the designs with Next and Previous.
- Select a design to see a larger sample on the right. The sample uses placeholder content, not yours.
- Select Apply template. Your content stays the same. The message "Your CV template has been updated" confirms the change.
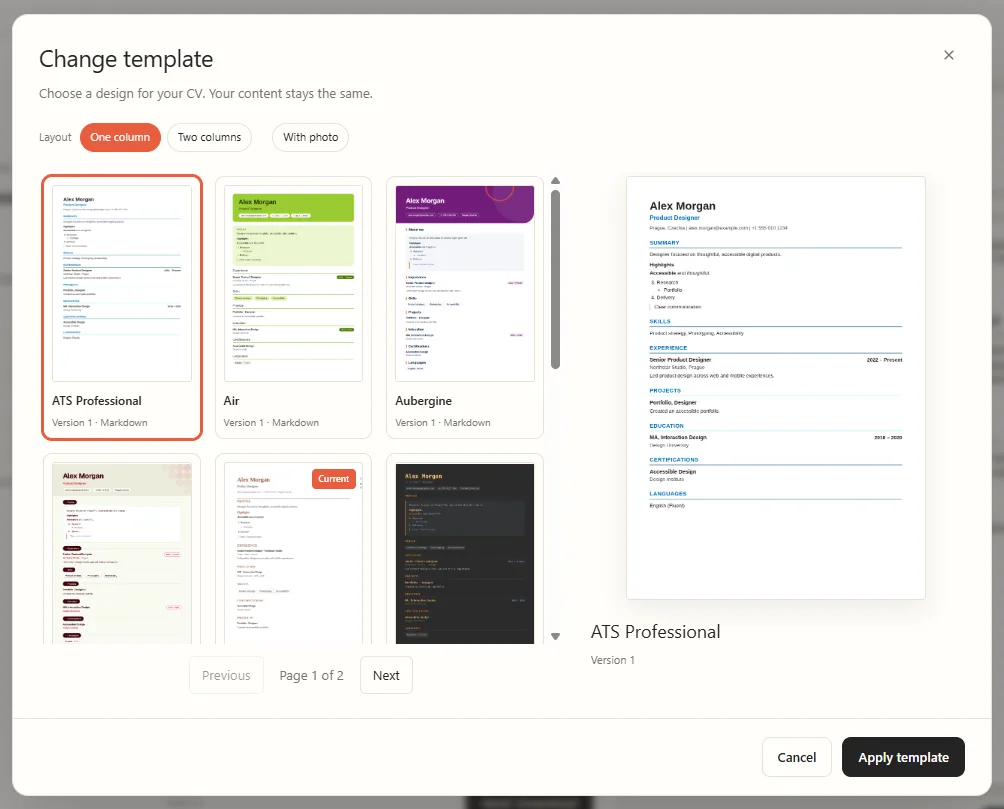
You can also browse designs before you sign in on the CV templates page. A one-column design such as ATS Professional keeps the layout simple, which can help if recruiting software processes your CV.
Step 5: Check the preview
The preview on the right shows your CV on A4 paper with the selected template. Check these points before you export:
- Names, dates and links are correct.
- The summary and the most recent role read well at a glance.
- Nothing is cut off or runs onto a second page by accident. If the CV has several pages, use the arrows under the preview to move between them.
If something looks wrong, go back to the relevant step, edit it, and select Save changes again.
Step 6: Export your CV
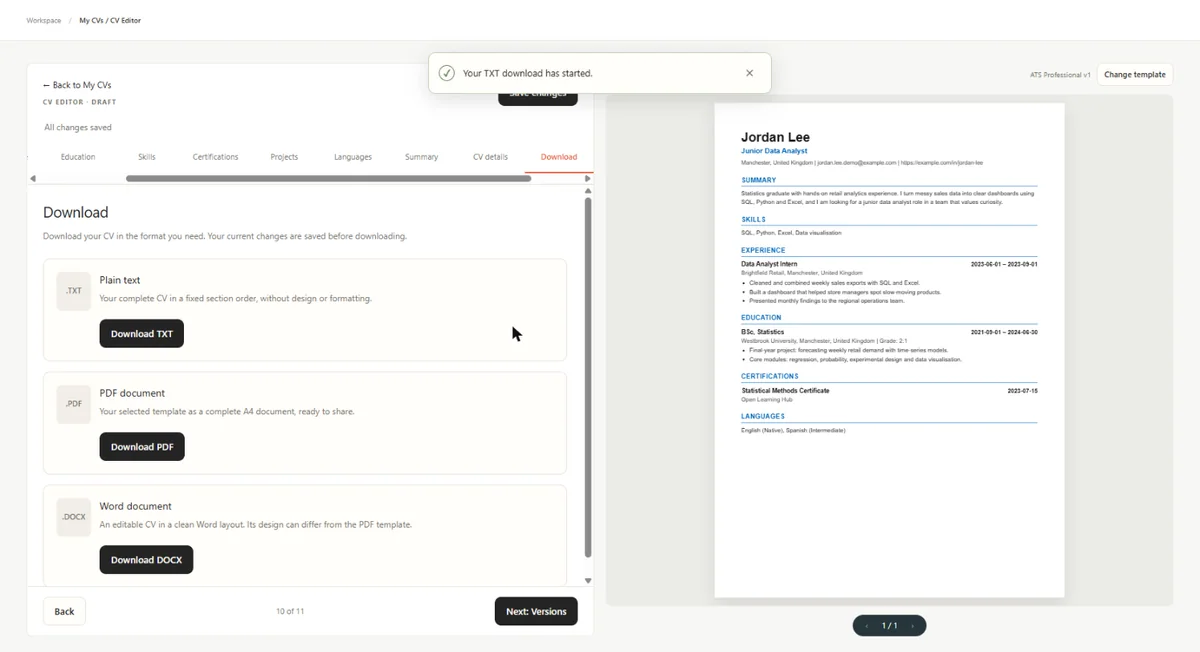
Open the Download step. CVizza saves your current changes first and then starts the download. If saving fails, the export stops and your form stays as it was.
| Format | What you get | Best for |
|---|---|---|
| TXT | Your complete CV as plain text in a fixed section order, with no design. It does not depend on the template | Application forms that ask you to paste text |
| Your selected template as a complete A4 document | Sending to employers | |
| DOCX | An editable Word document in a clean layout. Its design can differ from the PDF template | Further editing in Word or a compatible editor |
Select Download TXT, Download PDF or Download DOCX.
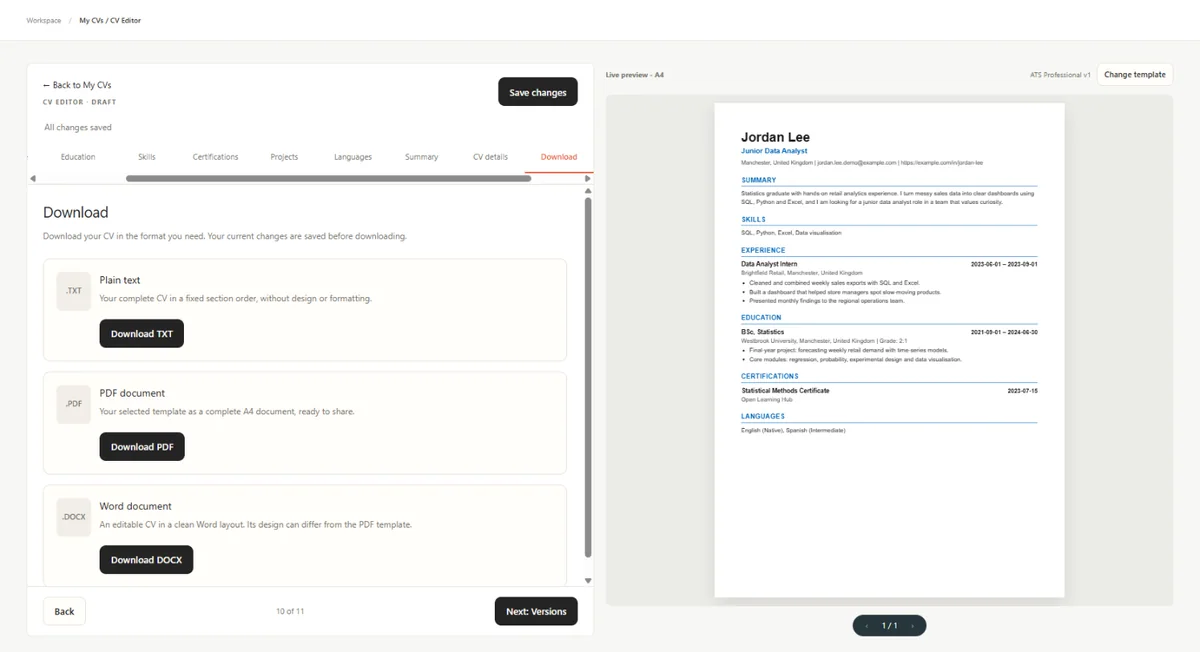
When the message "Your PDF download has started" (or TXT, or DOCX) appears, your browser is saving the file. The file name is based on the CV name.
A DOCX file can paginate differently from the PDF, because it depends on the Word version and the fonts available on your computer. Open the file once and check it before you send it.
Other places to download
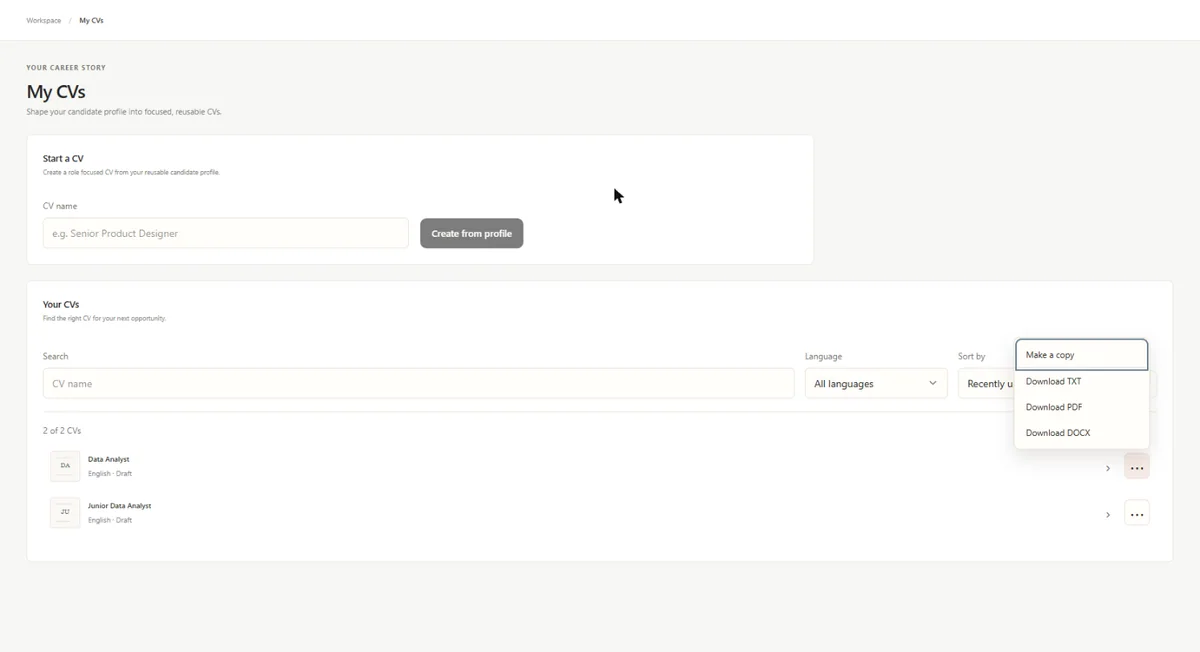
- My CVs: select the three dots next to a CV, then Download TXT, Download PDF or Download DOCX. The same menu has Make a copy, which creates a separate draft with the saved content, photo and template, so you can tailor it for another role. Published versions are not copied.
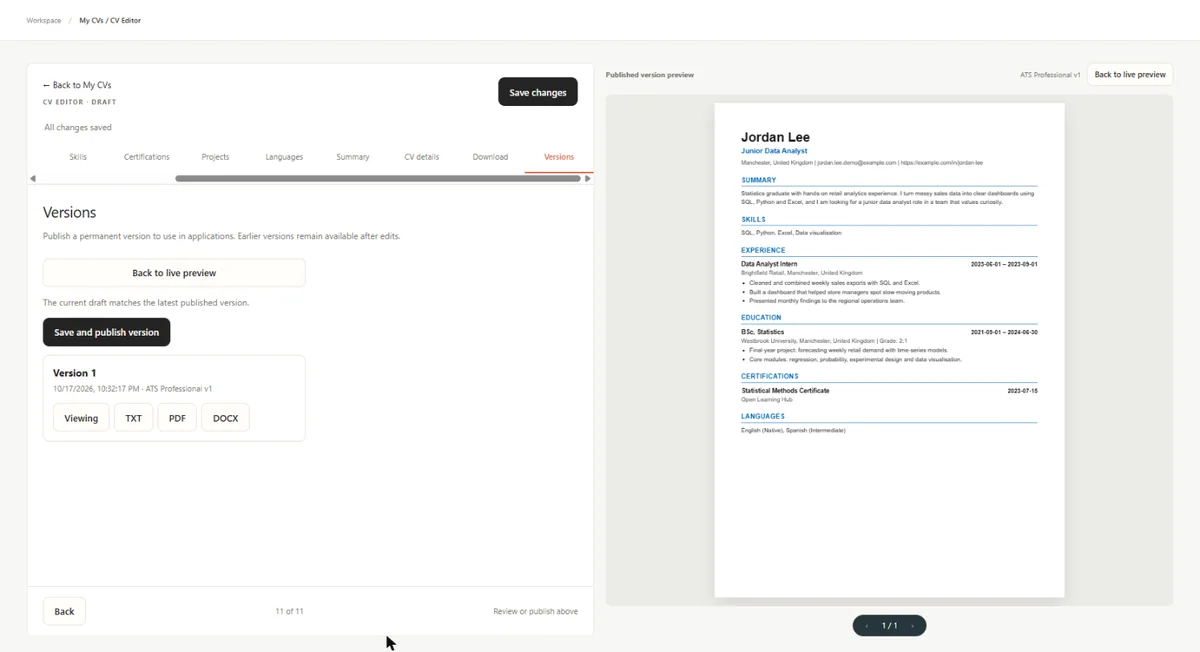
- Versions: each published version has View, TXT, PDF and DOCX buttons that download that exact version.
Publish a version when you apply
A draft keeps changing as you edit. When you are ready to use a CV for an application, open the Versions step and select Save and publish version. A published version is a permanent snapshot. View shows it in the preview with the label "Published version preview", and Back to live preview returns you to your draft. Later edits to the draft never change the version.
The Getting started guide shows how to attach a published version to a job application.
What to do next
- Create another CV for a different role with Make a copy or Create from profile.
- Update your candidate profile when your experience changes.
- Browse more designs on the CV templates page.