
Track your job applications
Follow your job applications in CVizza: change statuses on a list or board, log interviews, keep the CV you sent, write private notes and archive old ones.
This guide shows how to follow your job applications in CVizza after you have saved them: find an application in the list or on the board, move it through the hiring stages, log calls and interviews, keep the CV you sent, write private notes, and archive applications you no longer need. Everything here is a private record for you. CVizza never contacts employers or sends anything on your behalf.
Before you start
You need at least one saved application. If you have none yet, follow Add a job to your application tracker first. To attach a CV to an application, you also need a CV draft, as described in Create and export your first CV.
Find your applications
Select Applications in the sidebar. The Your opportunities list shows each application with its title, location, employer, status, the date you applied, and a link to the original posting (or "Pasted description" if you imported text).
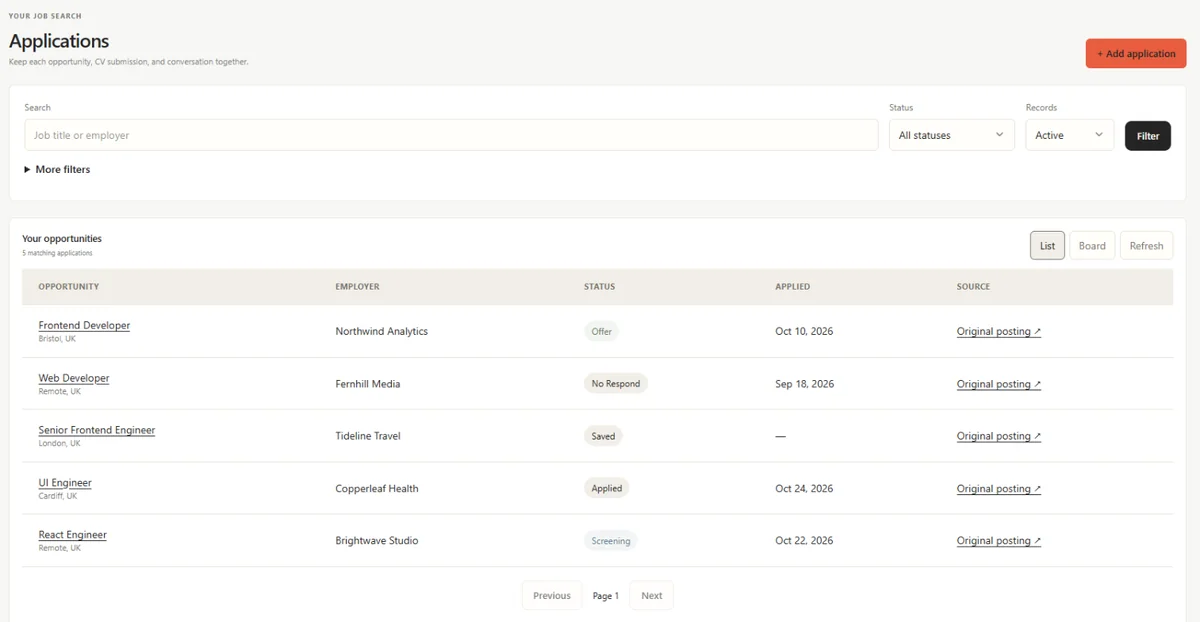
Use the filters at the top to narrow the list, then select Filter:
- Search: part of the job title or the employer name.
- Status: one status, or Active applications, which shows everything in Applied, Screening, Interview or Offer.
- Records: Active (the default) hides archived applications, Archived shows only them, and All records shows both.
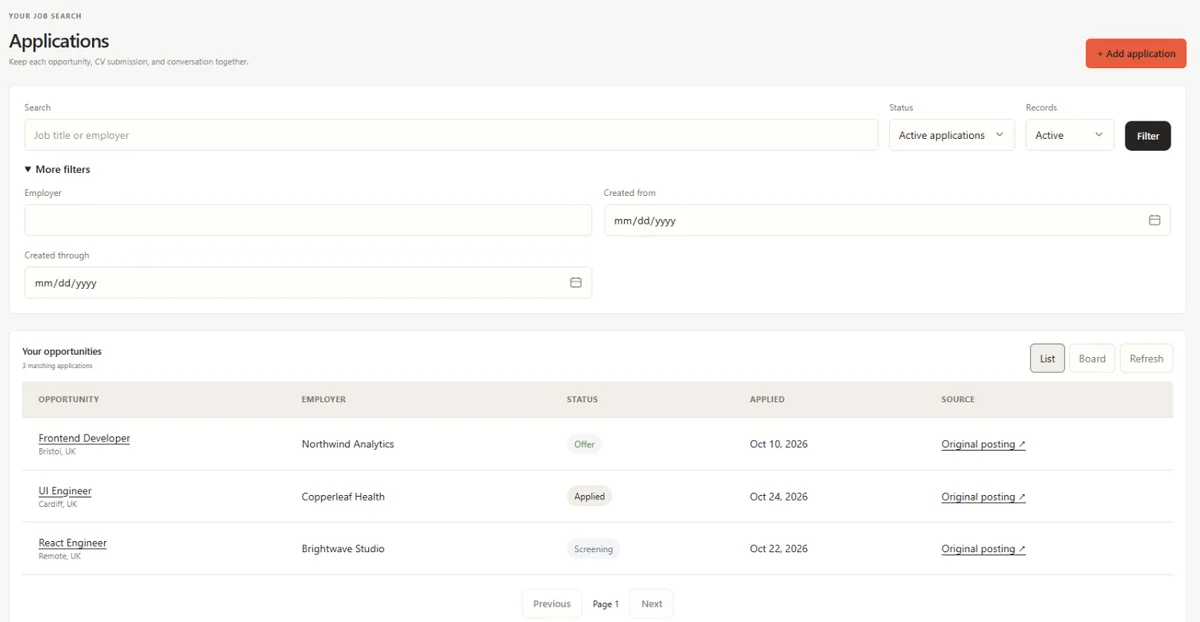
- More filters: an Employer name and a Created from / Created through date range for when you added the application.
Use the board
Select Board above the list to see the same applications grouped in columns by status. Columns that do not fit on screen scroll sideways.
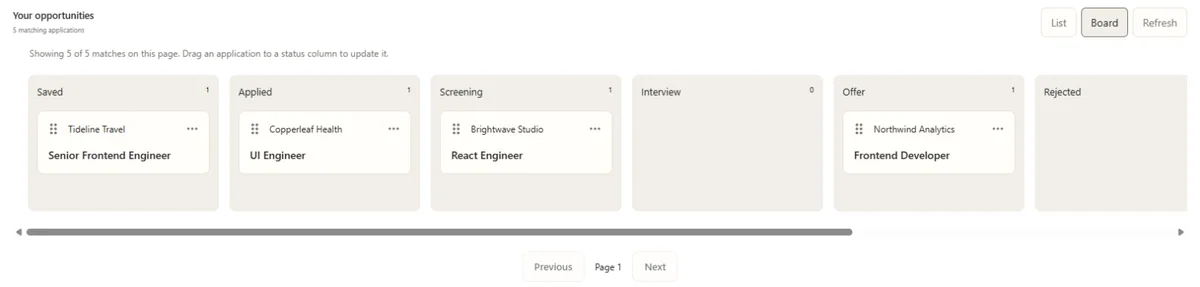
- Drag a card by its handle to another column to change its status. You can also use the keyboard: focus the handle, press Space or Enter, move with the arrow keys, and press Space or Enter again to drop.
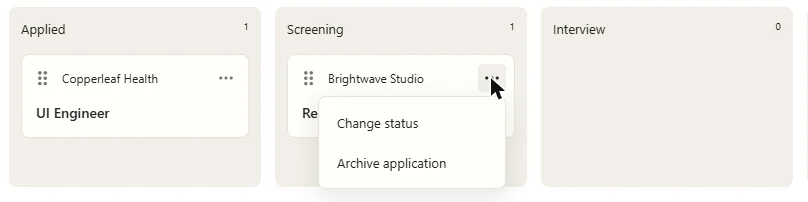
- Select the three dots on a card (or right-click the card) for Change status and Archive application.
The board shows the applications on the current page of results, up to 20 at a time, and the column counts refer to that page. Use the filters or Next to see the rest.
Open an application
Select an application's title to open it. The page has four tabs:
- Overview: the job description, technologies, posting salary, dates, a link to the original posting and the CV currently attached.
- Activity: a dated history of everything that happened.
- Notes: your private notes and expected salary.
- Tracking: the status and the archive button.
The current status is shown at the top right of the page. To correct the job details themselves, select Edit on the Description card, as explained in Add a job to your application tracker.
Update the status
- Open the Tracking tab.
- Choose the new Status.
- Optionally add a Reason, for example who contacted you and what the next step is.
- Select Update status.
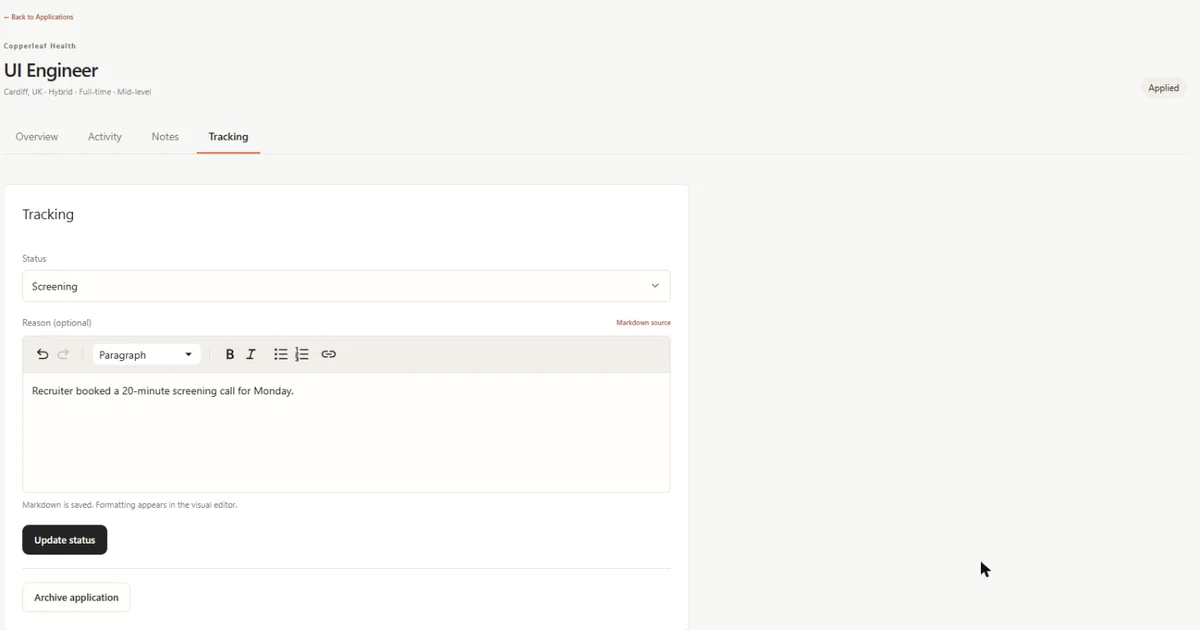
These statuses are available:
| Status | Use it when |
|---|---|
| Saved | You are interested but have not applied yet |
| Applied | You have sent your application |
| Screening | A recruiter or an initial screening is in progress |
| Interview | You are in the interview stages |
| Offer | You have received an offer |
| Rejected | The employer has turned down your application |
| Withdrawn | You have withdrawn from the process |
| No Respond | You never heard back and have stopped waiting |
You can move between any two statuses, including backwards, for example to fix a mistake or when an employer reopens a role. Each change is added to Activity with the old and new status and your reason. When an application moves to Applied for the first time, CVizza records that moment as the applied date, unless you entered a date yourself.
No Respond is not the same as archiving. The application stays in your list, but it no longer counts as active.
Record calls, interviews and notes
The Activity tab keeps a timeline of the application. CVizza adds entries for you when you create the application, change its status, or archive or restore it. You add the rest yourself.
- Open the Activity tab and select Add event.
- Choose an Event type: Note, Recruiter contact, Technical interview, Onsite interview or Cv submission.
- Set Occurred at if the event did not happen just now. You can enter an earlier date, so you can record past calls and interviews after the fact.
- Add a Comment. It is required for a Note and optional for other events. You can use bold, italics, lists and links.
- Select Add event.
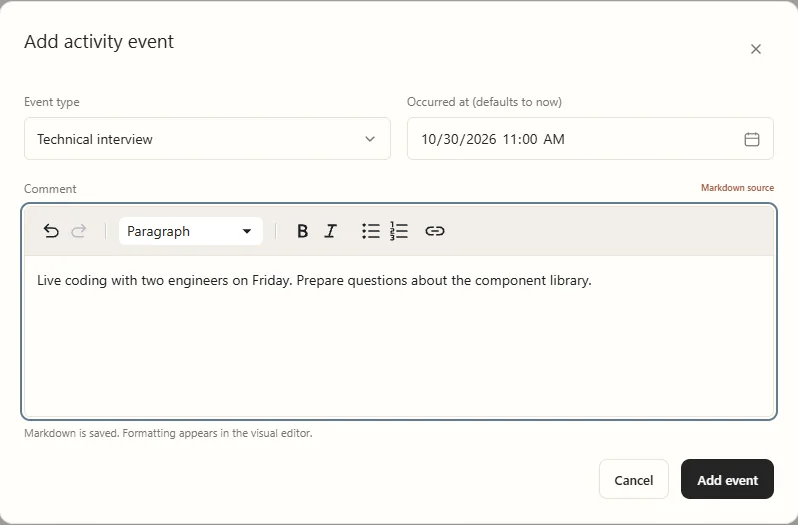
Events are listed newest first, by the date they occurred. Each entry also shows when you recorded it.
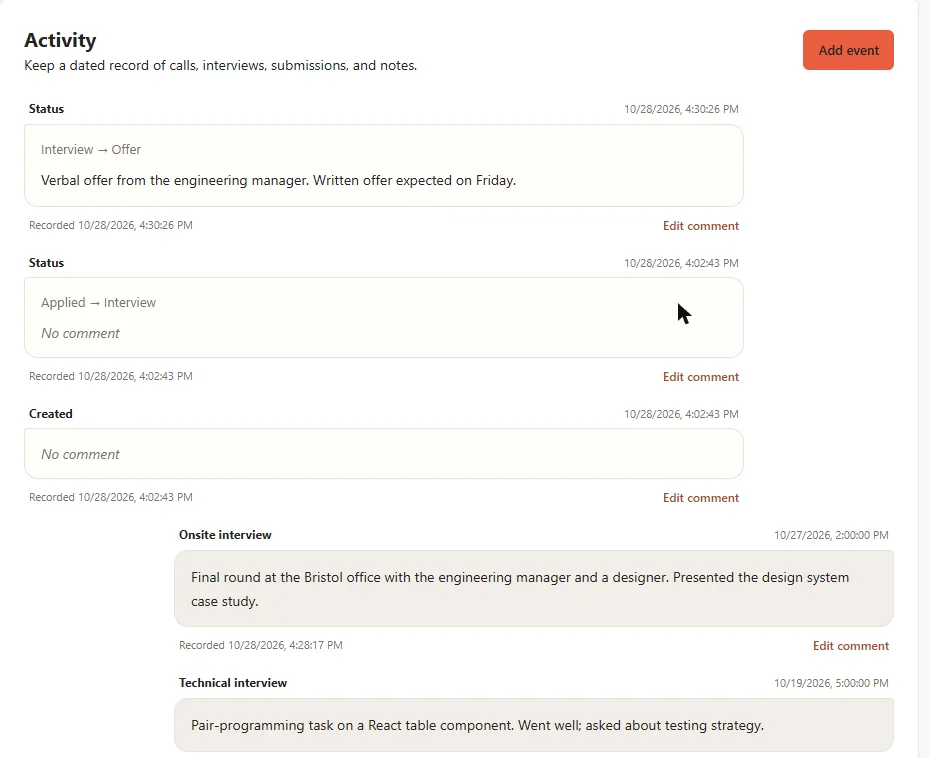
Adding an event never changes the status. If you want the status to reflect an interview, update it on the Tracking tab as well.
Entries cannot be deleted, so the history stays reliable. To correct what an entry says, select Edit comment below it and select Save comment.
Keep the CV you sent
When you send a CV, record it as a Cv submission event. The application then keeps that exact CV, even if you edit the draft afterwards.
- Open the Activity tab and select Add event.
- Set Event type to Cv submission, and set Occurred at to the day you sent it.
- Select Choose CV. Pick a CV draft on the left, then a published version on the right, and select Attach selected version. If the draft has no published version yet, CVizza creates one from your saved draft when you add the event.
- Select Add event.
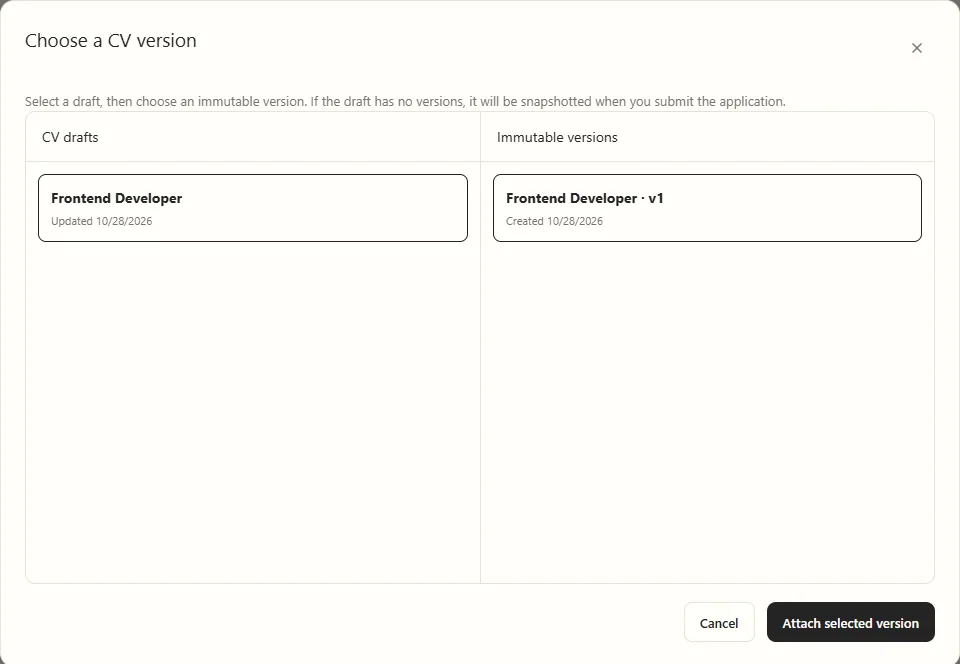
If you sent a CV when you first saved the application, it is already there: attaching a CV in the review dialog creates the same kind of event.
The Overview tab shows the Current CV attachment. If you sent several CVs to the same employer, the submission with the latest Occurred at date counts as the current one. Earlier submissions stay in Activity.
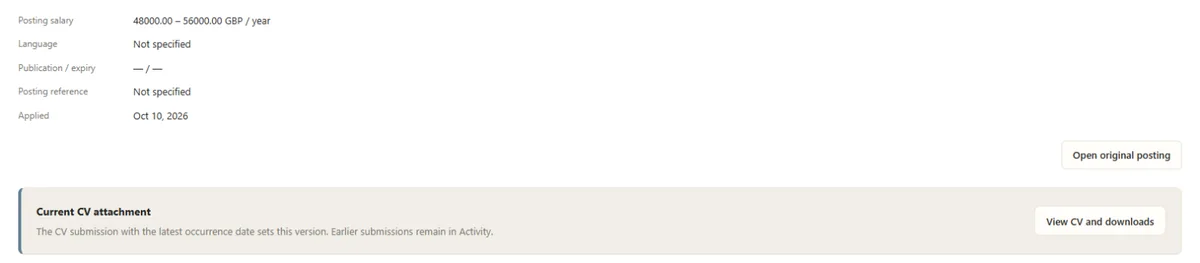
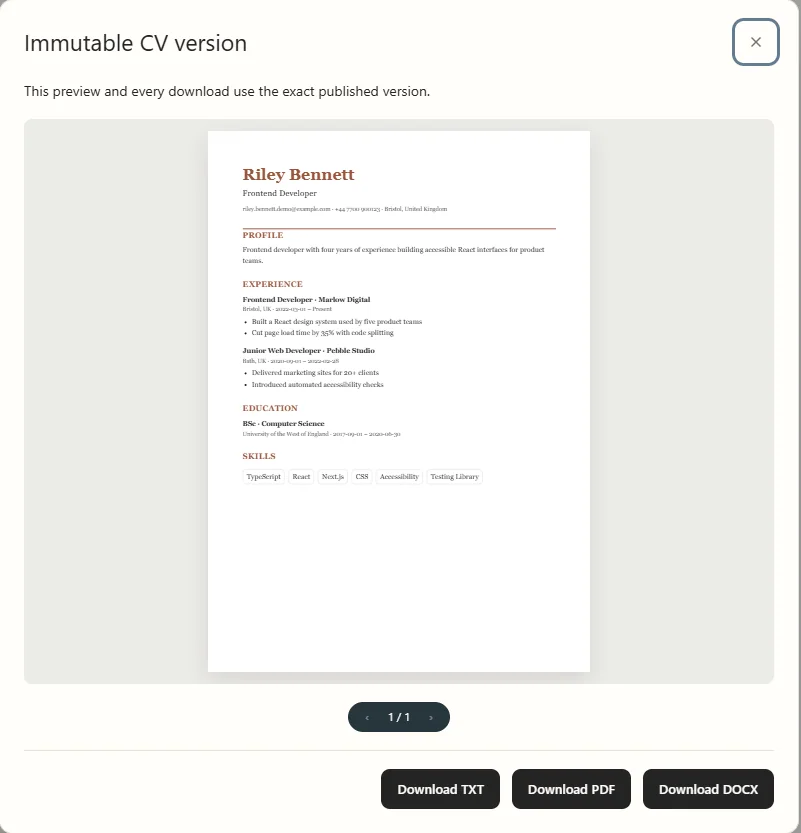
Select View CV and downloads on the Overview tab, or View submitted CV and downloads in an activity entry, to see the CV exactly as you sent it. Download TXT, Download PDF and Download DOCX always use that version, not your current draft.
Keep private notes and your expected salary
Use the Notes tab for anything you want to remember about the role: names, questions to ask, or your impressions after an interview.
- Open the Notes tab.
- Write in Private notes. You can use the visual editor or switch to Markdown source.
- Optionally fill in Expected salary minimum, Expected salary maximum, Currency (a three-letter code such as GBP or EUR) and Pay period.
- Select Save notes and salary.
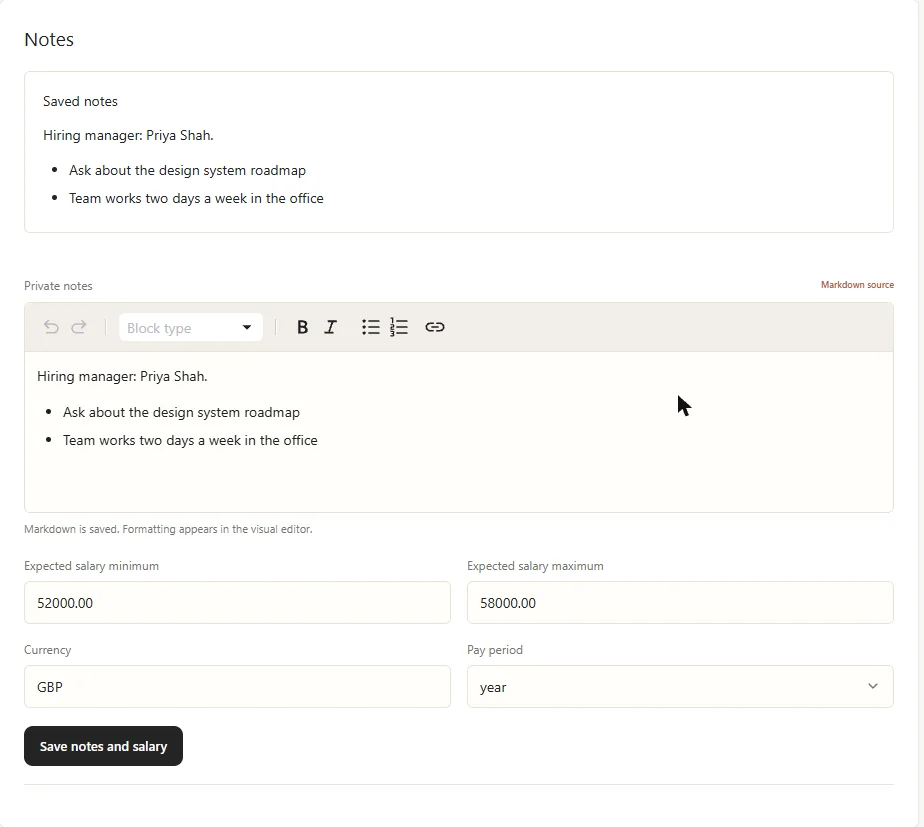
The expected salary is your own target. It is kept separately from the salary in the job posting, which you see on the Overview tab.
Archive applications you are done with
Archiving moves an application out of your active list without deleting anything. Use it for rejected, withdrawn or old applications that you want to keep for reference.
- Open the application's Tracking tab and select Archive application, or use Archive application in the card menu on the board.
- Select Confirm.
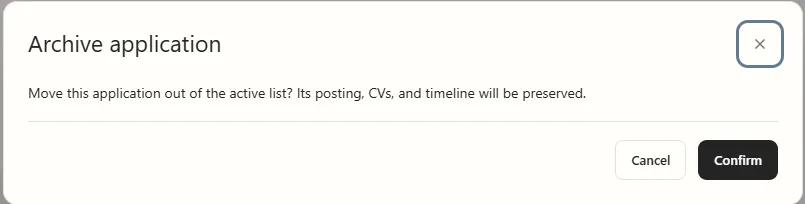
The status does not change when you archive. To see archived applications, set Records to Archived and select Filter. Each one is marked Archived under its status.
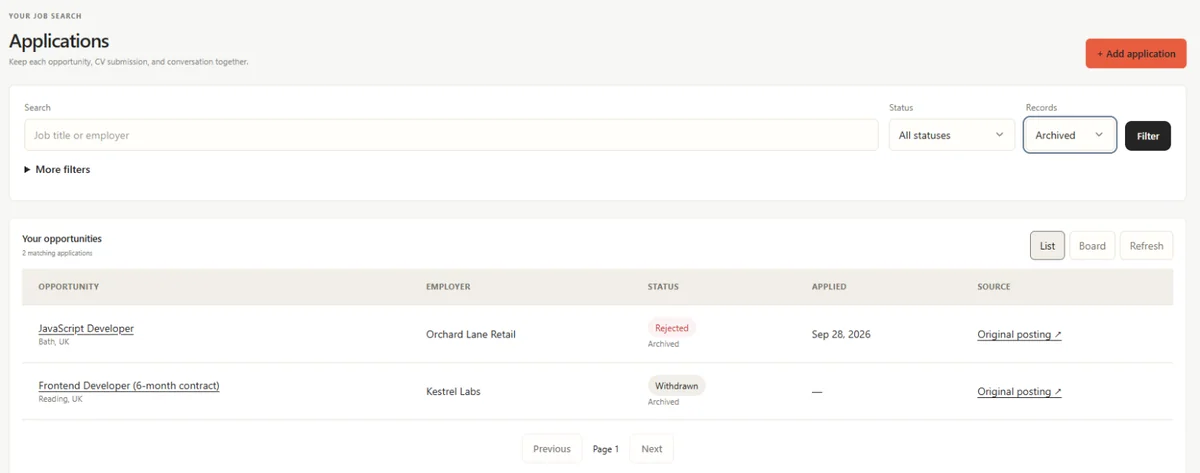
To bring an application back, open it and select Restore application on the Tracking tab, then Confirm. You can also use Restore application in the card menu on the board.
If something does not look right
- An application is missing from the list. Check the Status and Records filters. Archived applications are hidden unless Records is set to Archived or All records.
- The board shows fewer cards than you expect. The board only shows the current page of results. Use the filters or Next.
- You logged an interview but the status did not change. Events do not change the status. Update it on the Tracking tab.
- The wrong CV is shown as current. Check the Occurred at dates of your Cv submission events. The latest one is the current attachment. Add a new submission with the correct date if needed.
- You edited your CV after applying. The application still shows the version you attached. To send an updated CV, publish a new version and record a new Cv submission.
What to do next
- Add more jobs with Add a job to your application tracker.
- Tailor a CV for your next application with Create and export your first CV.
- Let an AI assistant summarize your applications or update statuses for you: see Getting started with CVizza MCP.